
To import additions, go to 'Payments' > 'Import' > 'Import Additions from CSV File...':
1) Browse to the location of your CSV File
2) Select the required file and click 'Open'
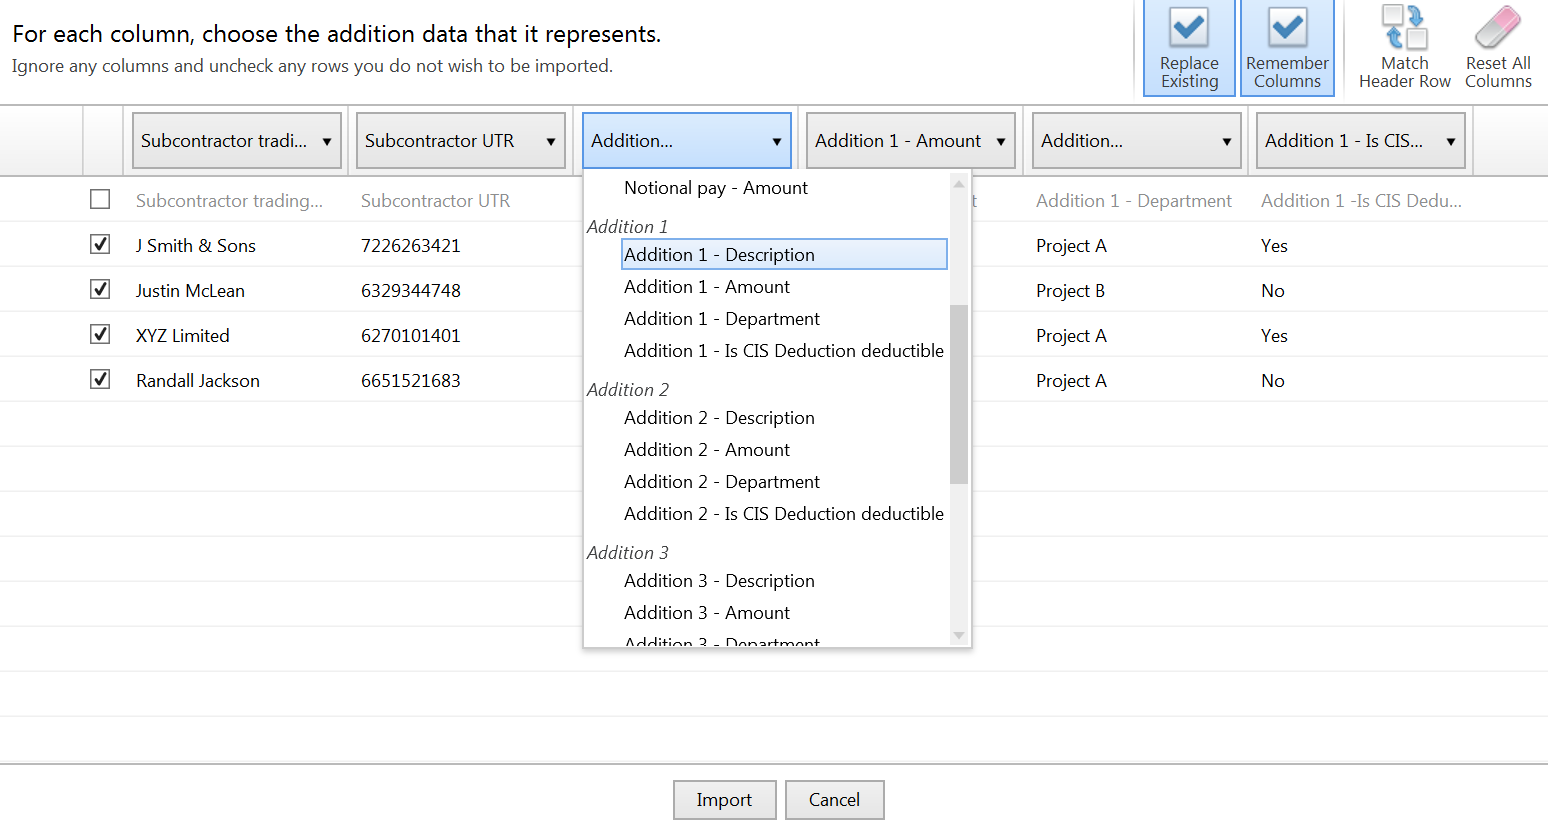
3) Your subcontractor data will be displayed on screen. For each column, choose the payment data it represents. Ignore any columns and uncheck any rows you do not wish to be imported.
-
To assist with column selection, simply select 'Match Header Row'. BrightCIS will try and match as many columns as it can for you
-
Also indicate whether you would like to replace the equivalent pay items that are already present on each subcontractor's payment screen with the new amounts being imported in by selecting/de-selecting 'Replace Existing'
-
Should you wish to remember your column selection for future imports, instruct BrightCIS to 'Remember Columns'. BrightCISwill subsequently remember the column selection used in the previous import when next importing a CSV file.
- Should you wish to reset your column selection at any time, select 'Reset All Columns'.
4) Click Import to complete the import of your payment information.
Fields which can be imported into BrightCIS using the Additions CSV File option are:
For matching to subcontractor record:
Subcontractor trading name
Subcontractor UTR
Addition 1:
Description
Amount
Department
Is CIS Deduction deductible
Addition 2:
Description
Amount
Department
Is CIS Deduction deductible
Addition 3:
Description
Amount
Department
Is CIS Deduction deductible
Addition 4:
Description
Amount
Department
Is CIS Deduction deductible
Addition 5:
Description
Amount
Department
Is CIS Deduction deductible
A CSV file template for the above can be accessed here.
Comments
0 comments
Article is closed for comments.